
The LB Health Check Kit may be used as part of a LifeKeeper resource hierarchy to help route load balancer traffic to the cluster node where a particular resource is currently in-service. This is achieved by maintaining a listener on a user-specified TCP port on the cluster node where the resource is in-service.
Create Frontend IP Resource(s)
When using a Google Cloud load balancer with IP forwarding disabled (see the ‘Disable IP Forwarding’ section of Google Cloud – Using an Internal Load Balancer), the IP address(es) associated to the load balancer frontend(s) must be added to a local network interface on each backend server using network mask /32 (equivalently, 255.255.255.255). In these configurations, the load balancer frontend IP address is not automatically added to a network interface by any cloud agent process. Instead, it must be added manually within the guest operating system on each backend server. The simplest way to achieve this is by creating a LifeKeeper IP resource for each load balancer frontend IP address, which will then be added as a dependency of the LB Health Check resource that will be created in the next section.
Following the steps given in Creating an IP Resource, create and extend an IP resource for each load balancer frontend IP address using the following parameters:
| Create Resource Wizard | |
|---|---|
| Switchback Type | intelligent |
| Server | node-a |
| IP Resource | <Frontend IP Address> |
| Netmask | 255.255.255.255 |
| Network Interface | <Network Interface> |
| IP Resource Tag | <Resource Tag> |
| Pre-Extend Wizard | |
| Target Server | node-b |
| Switchback Type | intelligent |
| Template Priority | 1 |
| Target Priority | 10 |
| Extend comm/ip Resource Hierarchy Wizard | |
| IP Resource | <Frontend IP Address> |
| Netmask | 255.255.255.255 |
| Network Interface | <Network Interface> |
| IP Resource Tag | <Resource Tag> |
Now that IP resources have been created for each load balancer frontend IP address, we may now create the LB Health Check resources that will respond to the load balancer health check probes.
Create a LB Health Check Resource
In this example we will create a sample LB Health Check resource on server node-a listening on TCP port 54321.
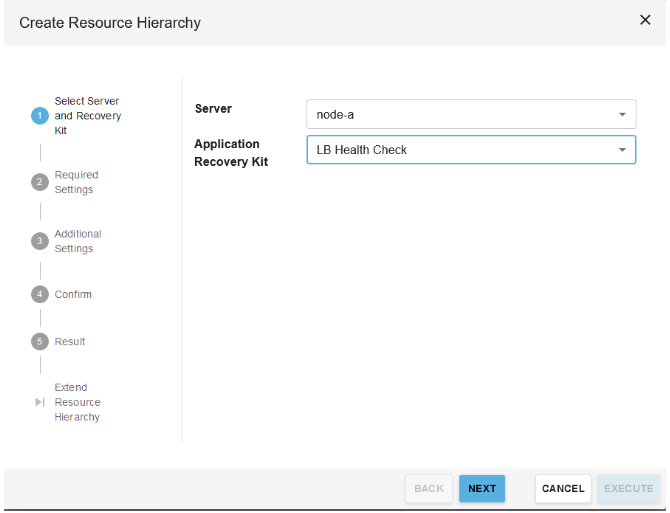
- In the LifeKeeper Web Management Console, click “Operations” dropdown and “Create Resource Hierarchy” in the dropdown to open the “Create Resource” Screen. Select the desired primary node for “Server” and select the “LB Health Check” for Application Recovery Kit.
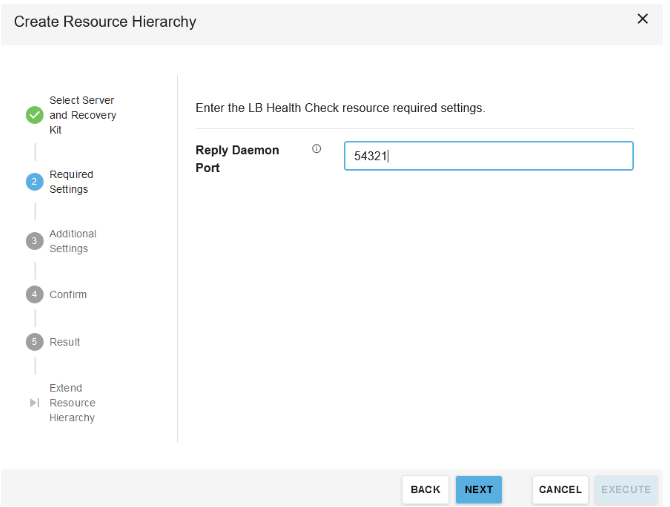
- Enter the “Reply Daemon Port” that will be used when prompted. Then click “Next”.
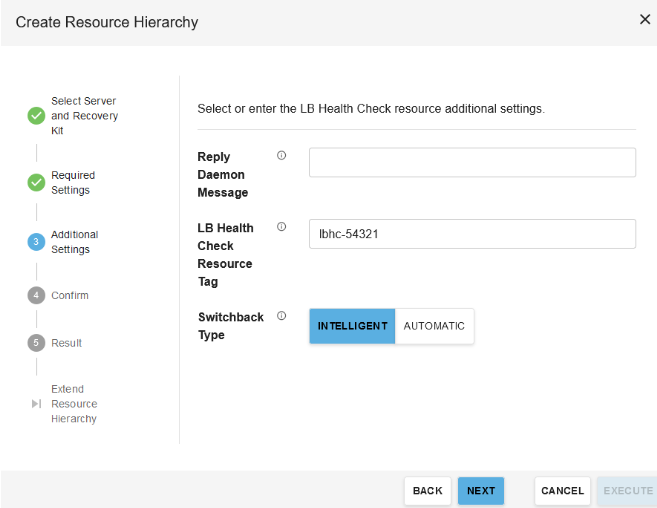
- Enter the following values into the Create Resource Wizard and click “Create” when prompted. The
![]() icon indicates that the default option is chosen.
icon indicates that the default option is chosen.
 icon indicates that the default option is chosen.
| Reply daemon message | None (Empty) |
| LB Health Check Resource Tag | lbhc-54321 |
| Switchback Type | Intelligent |
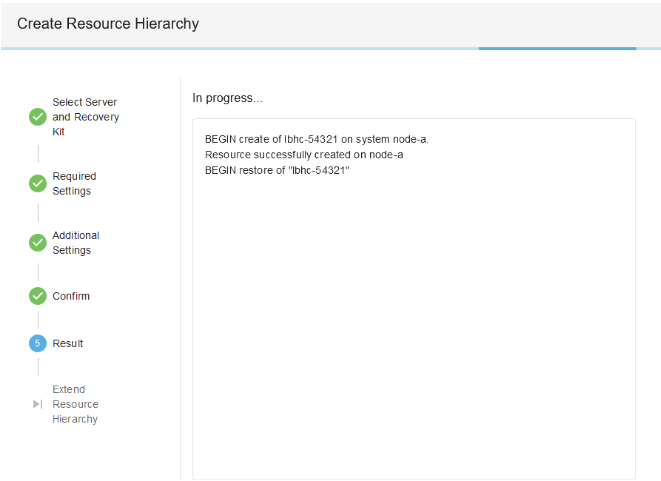
Once the resource has been created and brought in-service successfully, click “Next>” to proceed to the Confirm screen. When ready, click “Execute”
- After the resource completes creation and restoration, select the “Extend Resource Hierarchy” button.
- Enter the following values into the “Extend Resource Hierarchy” screen. The
![]() icon indicates that the default option is chosen.
icon indicates that the default option is chosen.
| Target Server | node-a |
| Template Priority | 1 |
| Target Server | node-b |
| Target Priority | 10 |
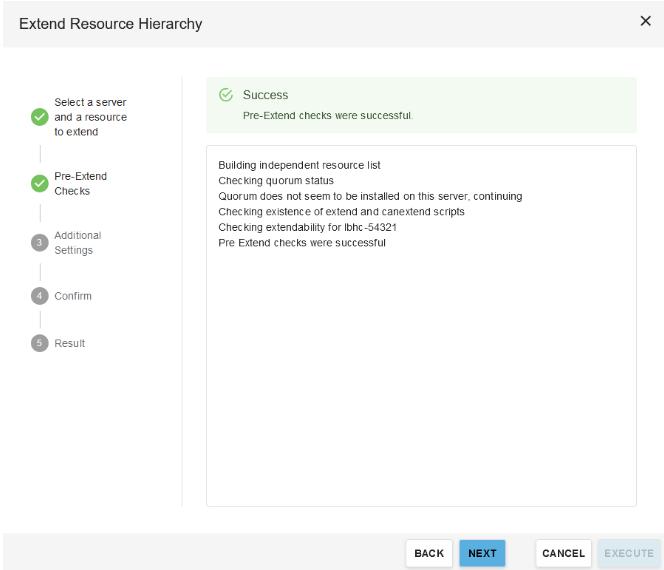
Once the pre-extend checks have passed, click Next> to proceed to the Extend Resource Hierarchy Wizard.
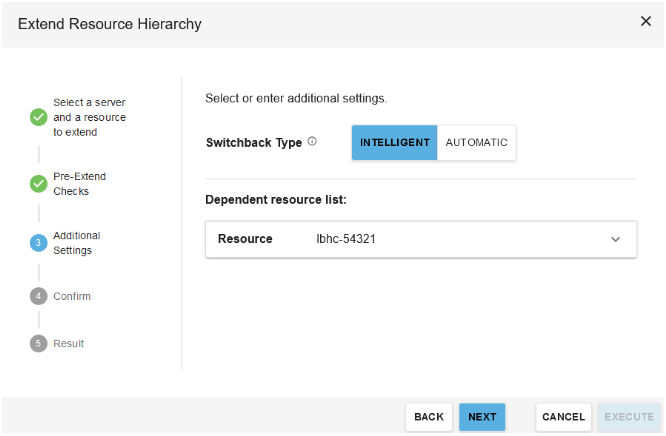
- On the “Additional Settings” screen, select the Switchback Type “Intelligent”. Then click “Next”
- On the “Confirm” screen, verify the selected options and select “Execute” when ready to proceed.
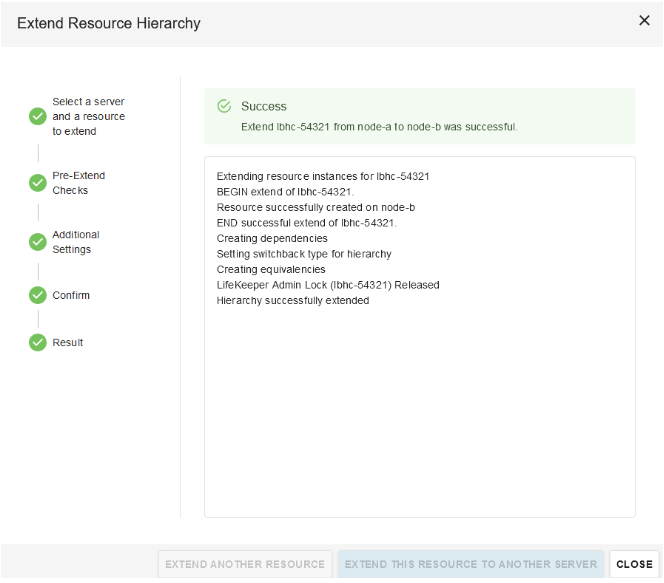
- Click “Close” to return to the LifeKeeper Web Management Console.
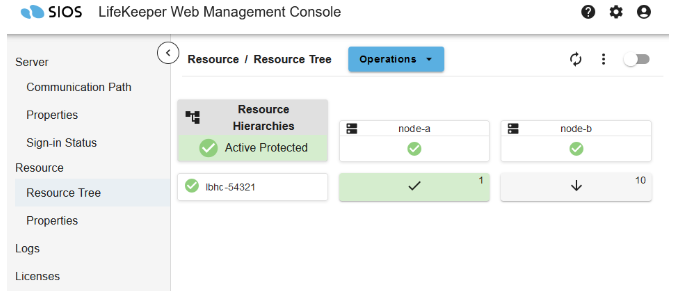
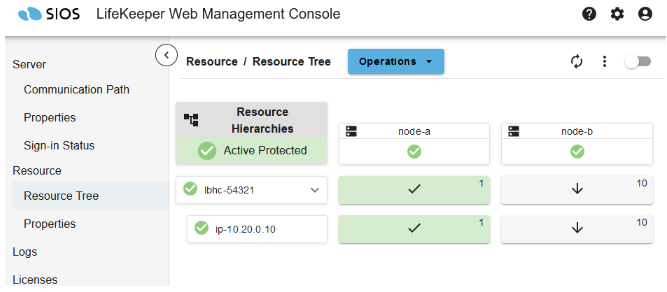
- Back in the LifeKeeper Web Management Console, we see that the newly created lbhc-54321 resource is Active on node-a and Standby on node-b. In this state, a TCP load balancer with a TCP health check on port 54321 will treat node-a as healthy and node-b as unhealthy, causing all load balancer traffic to be routed to node-a. When placed in a resource hierarchy with a protected application, this resource will ensure that load balancer traffic is always routed to the server on which the application is currently running.
Add Frontend IP Resources as Dependencies of LB Health Check Resource
When using a Google Cloud load balancer with IP forwarding disabled (see the ‘Disable IP Forwarding’ section of Google Cloud – Using an Internal Load Balancer), IP resource(s) protecting the IP address(es) associated to the load balancer frontend(s) (using network mask 255.255.255.255) must be added as dependencies of the LB Health Check resource. Complete the following steps for each of the IP resources created in the ‘Create Frontend IP Resource(s)’ section above.
- Right-click on the “lbhc-54321” resource and select “Create Dependency…” from the drop-down menu.
- For “Child Resource Tag”, specify the resource protecting the frontend IP address of the load balancer.
- Click “Next>” to continue, then click “Create Dependency” to create the dependency.
Once the IP resource has been added as a dependency, the resulting hierarchy will look similar to the following:
Test LB Health Check Resource Switchover and Failover
In this section we will assume that we have created an internal load balancer with node-a and node-b as backend targets which has the following properties:
- Front-end internal IP: 10.20.0.10
- TCP health check on port 54321
and that the “lbhc-54321” LB Health Check resource that was created in the previous section is currently Active on node-a.
For convenience we will set up a temporary Apache web server that will simply return the hostname of each server. Execute the following commands on both node-a and node-b. Adjust the commands accordingly (e.g., to use zypper install) if installing on a SLES server.
# yum install -y httpd
# systemctl start httpd
# echo $(hostname) > /var/www/html/index.html
Before continuing, verify that traffic is allowed on TCP port 80 for node-a and node-b.
We will now test the switchover and failover capabilities of the lbhc-54321 LB Health Check resource.
- With the lbhc-54321 resource Active on node-a and Standby on node-b, verify the output of the following command on each server.
[root@node-a ~]# curl http://10.20.0.10
node-a
[root@node-b ~]# curl http://10.20.0.10
node-a
- Execute the following command on node-a:
[root@node-a ~]# while true; do curl http://10.20.0.10; sleep 1; done
and initiate a switchover of the lbhc-5432 resource to node-b. Once the switchover has completed successfully, use Ctrl-C (SIGINT) to terminate the running command on node-a.
The output of the command should be similar to:
…
node-a
node-a
node-a
[switchover occurs]
node-b
node-b
node-b
…
In particular, the load balancer should cleanly stop routing traffic to node-a before beginning to route it to node-b. If the output near the switchover point looks like the following:
…
node-a
[switchover occurs]
node-b
node-a
node-b
node-a
node-b
node-a
node-b
node-b
node-b
…
then you may need to edit the health check properties to decrease the time between health check probes and/or decrease the minimum number of unsuccessful health check probes before a backend instance is marked unhealthy and removed from the load balancer pool. See the Tuning Load Balancer Health Check Parameters section below for more details.
- With the lbhc-54321 resource Active on node-b, execute the following command on node-a:
[root@node-a ~]# while true; do curl http://10.20.0.10; sleep 1; done
and forcefully reboot node-b to initiate a failover of the lbhc-54321 resource back to node-a:
[root@node-b ~]# echo b > /proc/sysrq-trigger
After the failover has completed successfully, use Ctrl-C (SIGINT) to terminate the running command on node-a.
The output of the command on node-a should be similar to:
…
node-b
node-b
node-b
[failover occurs]
node-a
node-a
node-a
…
At this point basic verification of the LB Health Check resource behavior is complete. Execute additional tests as necessary to verify the interaction between the LB Health Check resource and your protected application on switchover and failover. Once finished testing the LB Health Check resource functionality, the temporary Apache web servers may be removed by executing the following commands on both node-a and node-b:
# systemctl stop httpd
# rm -f /var/www/html/index.html
# yum remove -y httpd
Post your comment on this topic.