
This startup guide provides the minimum necessary steps and related information to start using LifeKeeper. For specific operations of the Windows OS itself, please check the manual of your OS.
- Installing LifeKeeper for Windows
- Starting LifeKeeper
- Configuring the connection (communication path) between HA clusters
If you encounter any problems while following these steps, please contact your support representative.
1: Preparing for LifeKeeper Installation
Check the product information and restrictions
Please read the following before purchasing or installing LifeKeeper and each Recovery Kit for general information and restrictions.
- Release Notes: Contains information that users should be aware of, including new features provided in each version, discontinued features, bug fixes, system requirements, known issues and restrictions.
- Certification Information: Provides information on operating systems, storage, and software versions that can be used with LifeKeeper and are supported for protection.
- Network Bandwidth: If replicating across a WAN, it is critical that a rate of change analysis be done to ensure there is adequate bandwidth.
- DataKeeper is a block-level volume replication solution and requires that each server have additional volume(s) (other than the system drive) that are the same size. Please review Volume Considerations for additional information regarding storage requirements.
- Review the section Understanding Replication to help understand how DataKeeper works and the difference between synchronous and asynchronous replication.
- Ensure that you have the correct version and/or capacity of all components for each LifeKeeper for Windows server by reviewing Verifying Server Specifications . Note: All servers within a cluster should be running the same version of Windows.
- Plan your communication paths for your cluster. For optimal performance, multiple communication paths must be defined. Review Planning Server Communication for additional information.
- LK supports either shared storage or replicated storage. Review Storage and Adapter Requirements and Configuring Your Storage for additional information.
- In order for LifeKeeper for Windows to function properly, it is important that your networking is configured as described in Verifying Network Configuration. In particular, you must make sure that your Public NIC is at the top of the binding order on all of the cluster nodes.
- Before installing any applications (Oracle, SQL Server, Exchange, etc.), please review Installing and Setting Up Database Applications .
- Installing LifeKeeper for Windows is as straight forward as running the setup executable. The setup received from SIOS will go through the process of installing LK, DK and any optional ARKs. At the end of the setup, you will be prompted to enter your license key. Evaluation customers should use the time limited key that was supplied by SIOS.
Obtaining the LifeKeeper product license and product CD image file
If you purchased from SIOS Technology, Inc. (Japan)
Please refer to How to obtain a license .
If you purchased from SIOS Technology Corp. (USA)
Please refer to How to obtain a license .
Checking the network settings required for installation
Before installing LifeKeeper, certain operating system and network settings must be configured. If these settings are incomplete, an error message may be displayed during installation. Review the message and correct the settings as needed.
Check connection by IP address and name resolution
Each server in the HA cluster must have an assigned IP address and be able to communicate with the other servers.
In addition, the IP address and host name configured on each server must be resolvable by DNS or the C:\windows\system32\drivers\etc\hosts file. Ensure that the host name and name resolution settings for all servers are properly configured before installing LifeKeeper.
Checking firewall settings and antivirus software configuration
Antivirus software, Malware tools and other system security monitoring tools could interfere with the proper running of LifeKeeper and DataKeeper and stop LifeKeeper from updating a LifeKeeper registry key.
For information on configuring your antivirus software, see Antivirus Software Exclusion List for LifeKeeper and DataKeeper for Windows.
During installation, the appropriate rules required by LifeKeeper are added to the Windows Firewall, regardless of the firewall status (enabled or disabled). If the firewall rules were not installed during installation, you can run the firewall configuration script to add the firewall rules.
For details on the firewall rules to be added and how to apply them after installation, refer to Verifying Server Specifications.
To complete this step, configure the firewall as necessary to allow communication through the following ports.
- When using LKWMC
- REST API server: 5000/tcp
- GUI server: 5110/tcp
For firewall settings related to LKWMC, please also see the LKWMC: Firewall Rules . Also, if you need to change the port number you are using, refer to the LKWMC: Modifying the GUI Server Port and Modifying the REST API Server Port.
- When using the legacy GUI (Java GUI)
- For GUI server communication: 81/tcp, 82/tcp
- For RMI communication between the GUI server and GUI client: All ports from 1024/tcp and above
In the communication between the GUI server and GUI client used by the legacy GUI, Java RMI randomly uses ports starting from 1024. When applying access control or similar restrictions to the cluster system, consider these ports and configure appropriate packet filtering.
Determining the GUI used to operate LifeKeeper
Starting with LifeKeeper v10.0, the web-based application, LifeKeeper Web Management Console (LKWMC), is the default GUI.
For details about LKWMC, please refer to LifeKeeper Web Management Console.
If you need to use the legacy GUI (Java-based GUI, scheduled to be discontinued in the future) for some reason, it is available.
Depending on whether you use LKWMC or the legacy GUI, there are differences in the subsequent environment preparation and installation, so please decide which GUI you will use in advance.
How to use Single Server Protection
When using Single Server Protection (SSP), select only LifeKeeper for Windows in the Select Features section of the installation wizard. A warning about DataKeeper will be displayed, but if you plan to use it as the SSP, select “Yes (Y)” and proceed with the installation.
DataKeeper Installation and Account Setup
If you are using LifeKeeper for Windows, you must also install DataKeeper.
After launching the LifeKeeper installer, proceed through the wizard and you will be taken to the Select Features window. Select SIOS DataKeeper for Windows and follow the wizard instructions to complete the installation.
When using LifeKeeper for Windows (LifeKeeper and DataKeeper) in a workgroup environment, the LifeKeeper service must use the same account (ID and password) as the DataKeeper service when selecting the DataKeeper service logon ID and password on each system.
Reviewing the user used to install and manage LifeKeeper
This procedure requires a user with Administrator privileges to install LifeKeeper, regardless of whether the environment is a workgroup or a domain. For this procedure, set the same password for the user with Administrator privileges on all servers in the HA cluster.
Note that you can set different passwords for each server; however, this document sets the same password to simplify subsequent steps.
This completes all the settings required for the procedures in the Startup Guide.
Depending on the specific Recovery Kit or features you use in the future, additional firewall settings may be necessary. If required, refer to the following information to verify your settings. This step may be performed after completing the procedures in this guide.
- When using DataKeeper
2: Installing LifeKeeper for Windows
This section explains how to install LifeKeeper for Windows.
LifeKeeper is installed by running the LifeKeeper-<version>-setup.exe file included in the product image file LK-Win-<version>.zip.
The script is wizard-based, prompting you to make selections or provide appropriate input for each step.
In this startup guide, the product name LifeKeeper for Windows will be referred to as “LifeKeeper,” and LifeKeeper Single Server Protection will be referred to as “Single Server Protection” or “SSP.” Additionally, the executable file LifeKeeper-<version>-setup.exe will be referred to as the “Setup file.”
Additional information on this installation procedure
Before proceeding with the installation, verify the following:
LifeKeeper and Single Server Protection (Common)
- Use an administrator account for all installation procedures.
- The setup file collects information about your system environment and determines the necessary steps to install LifeKeeper.
If the system requirements for installation are not met, an error message will be displayed and the installation/upgrade will be canceled. - If any restrictions arise or configuration changes are required, a warning will appear prompting you to continue or cancel the installation. Review the displayed message to determine the appropriate action.
- If the installation is terminated due to an error message or warning, or if there are additional configurations, you can resume by running the setup script again.
LifeKeeper only
- LifeKeeper must be installed on every server within the HA cluster. Since the minimum configuration for a LifeKeeper HA cluster is two servers, you must perform the installation on both servers following this procedure.
- Details such as the LifeKeeper versions listed in the following procedures may differ from the officially released versions, as they include development-stage information. However, this does not affect the operational steps. Please adjust accordingly to match the version you are using.
Running the setup file
- Place the product zip file in any location. In this procedure, it is saved under C:\Users\Administrator.
- Use an extractor to place the file in any folder. In this example, we extract the files to C:\Users\Administrator\LK-Win-X.X.X.
- Run the setup file in the extracted folder.
- When you run the setup file, the installation wizard will start as shown below.
![]()
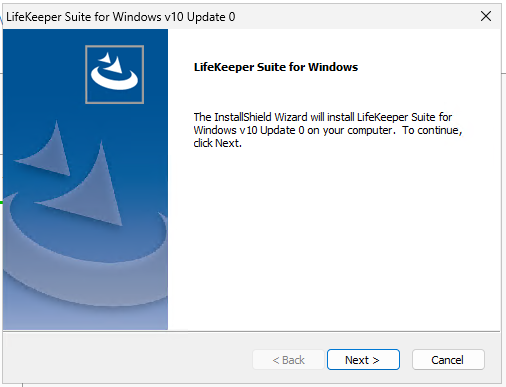
Setup installation wizard and selection of the Recovery Kits to use
After launching the Setup Wizard, you will be prompted to accept the EULA and then select the features you want to install.
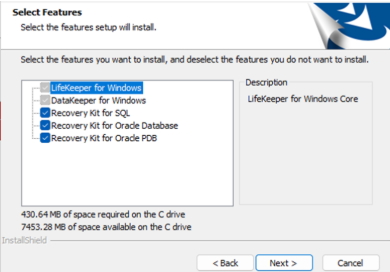
The software, Recovery Kits, and components available for selection here are as follows.
Please select the products and Recovery Kits based on the license you purchased.
- LifeKeeper for Windows
- DataKeeper for Windows
- Recovery Kit for SQL : Recovery Kit for Microsoft SQL Server
- Recovery Kit for Oracle PDB : Recovery Kit for Oracle Pluggable Database
- Recovery Kit for Oracle : Recovery Kit for Oracle Database
The selected installers will then be launched in the following order.
- LifeKeeper for Windows
- Recovery Kit for Oracle Pluggable Database
- Recovery Kit for Oracle Database
- Recovery Kit for Microsoft SQL Server
- SIOS DataKeeper Cluster Edition
This guide explains the installation of LifeKeeper for Windows step by step. You can skip any steps that are not necessary.
Installing LifeKeeper or Single Server Protection
When installing LifeKeeper for Windows, the Recovery Kits included in LifeKeeper and LifeKeeper core will be selected and installed. The following table shows the relationships between the selectable Recovery Kits and components and their names in the installer.
| Name in the installer | Component to be installed |
|---|---|
| IP Reovery Kit | Recovery Kit for IP |
| Generic Application Recovery Kit | Generic Application Recovery Kit |
| Internet Information Services (IIS) Recovery Kit | Recovery Kit for Microsoft Internet Information Services |
| DNS Recovery Kit | Recovery Kit for DNS |
| PostgreSQL Recovery Kit | Recovery Kit for PostgreSQL |
| Recovery Kit for JP1/AJS | Recovery Kit for JP1/AJS |
| LB Health Check Kit | Recovery Kit for Load Balancer Health Check |
| Recovery kit for Oracle® Cloud Infrastructure | Recovery Kit for Oracle Cloud Infrastructure |
| Route53 Recovery Kit | Recovery Kit for Amazon Route53™ |
| ECC Recovery Kit | Recovery Kit for Amazon EC2™ |
| Generic Quick Service Protect App | Recovery Kit for Quick Service Protection |
| LifeKeeper REST API | LifeKeeper REST API |
| LifeKeeper Web Management Console | LifeKeeper Web Management Console |
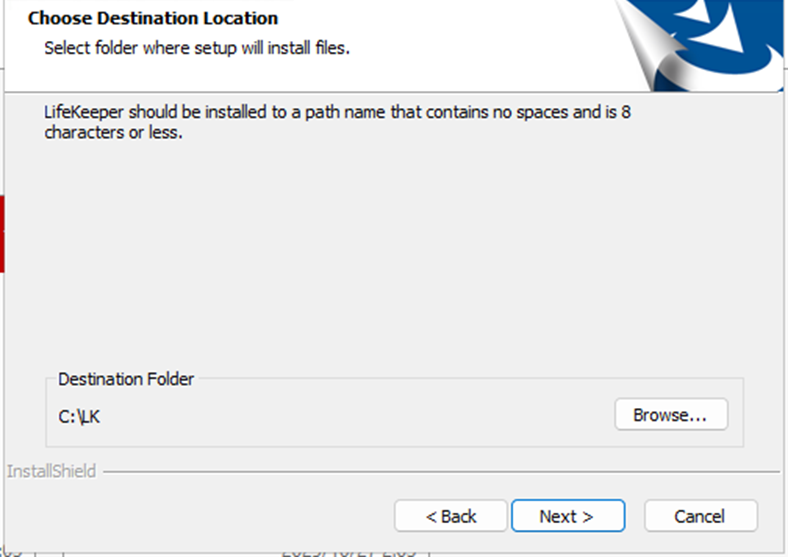
- Setting up an Installation Directory
You can specify the installation directory for LifeKeeper. If no directory is specified, it will be installed under C:\LK.
![]()
- Selecting the installation type
Select the LifeKeeper installation type.
- Selecting Typical will install the following:
- LifeKeeper
- All Recovery Kits included in Core
- LifeKeeper Web Management Console
- Lifekeeper REST API
- Selecting Compact will install the following:
- LifeKeeper
- Recovery Kit for EC2
- Recovery Kit for Route53
- Load Balancer Helth Check
- Quick Service Protection
- Volume
- LifeKeeper Web Management Console
- Lifekeeper REST API
- Custom
- Users can select the LifeKeeper components and Recovery Kits to install.
- Users can select the LifeKeeper components and Recovery Kits to install.
- Selecting Typical will install the following:
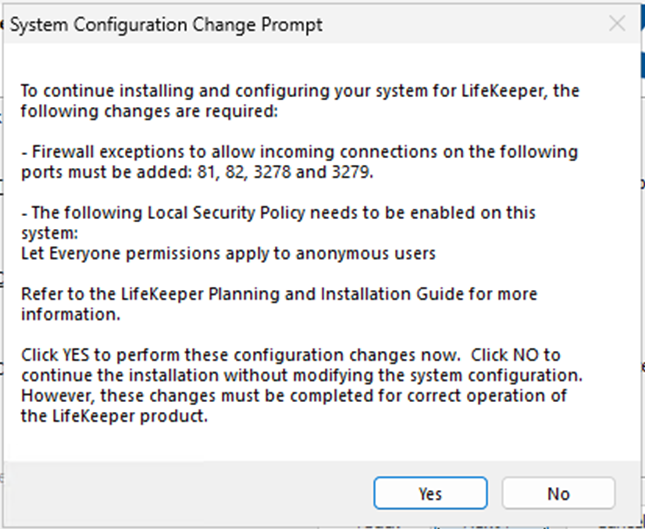
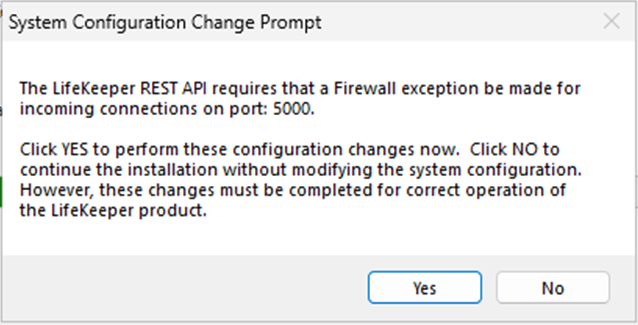
- Checking the ports used by LifeKeeper
Before proceeding with the installation, you will be asked to confirm the firewall for the ports used by LifeKeeper.
If there are no problems, click Yes to proceed.
![]()
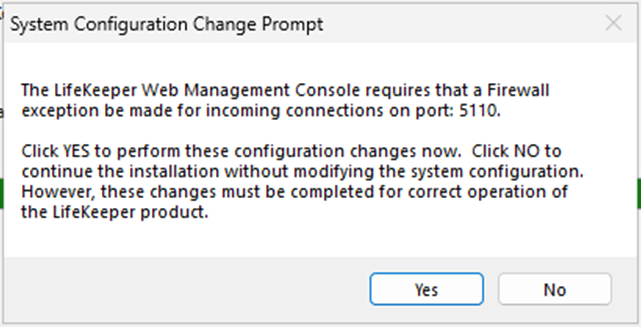
- Lifekeeper GUI port firewall rules
During installation, the following dialog will appear.
This confirms the firewall rules for the port used by the LifeKeeper Web Management Console.
If there are no problems, click Yes to proceed.
![]()
![]()
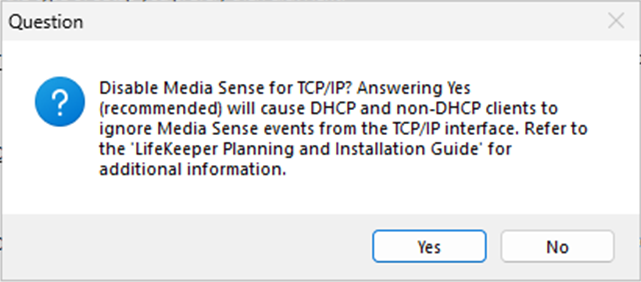
- Media Sense Registry Settings
After installation, the following dialog will appear.
If Media Sensing is enabled, LifeKeeper IP resources may not function properly. Therefore, LifeKeeper disables this Windows OS function during installation.
![]()
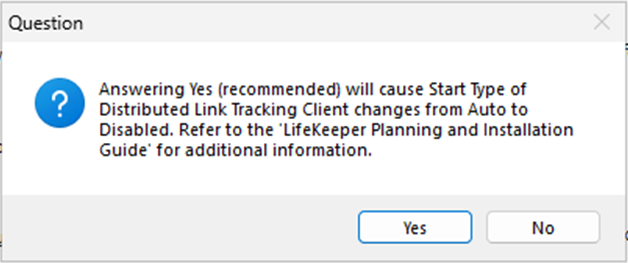
- Distributed Link Tracking Client Settings
If the Distributed Link Tracking Client service is enabled, volume control (locking) may not function properly.
Therefore, LifeKeeper disables this Windows OS function during installation.
![]()
Installing the Recovery Kit for Oracle Database
Follow the wizard to install. You will not be prompted to enter any information.
Installing the Recovery Kit for Oracle Plugable Database
Follow the wizard to install. You will not be prompted to enter any information.
Installing the Recovery Kit for Microsoft SQL Server
Follow the wizard to install. You will not be prompted to enter any information.
SIOS DataKeeper
- Select the features to install
Select the DataKeeper features to install.
To use DataKeeper, the SIOS DataKeeper Server Components must be installed.
The SIOS DataKeeper User Interface is not required unless there are special requirements. For details about the DataKeeper User Interface, refer to DataKeeper – User Interface.
- Checking the port used by DataKeepr
Before installation, a confirmation window will appear regarding the firewall for the ports used by DataKeeper.
If there are no issues, click Yes to proceed.
![]()

- Selecting a DataKeeper Service Login Account
Select the account to use for the DataKeeper service log in.
The LifeKeeper service must use the same account (ID and password) as the DataKeeper service when selecting the DataKeeper service logon ID and password for each system.
Selecting a domain account will take you to a window where you enter the account ID and password.
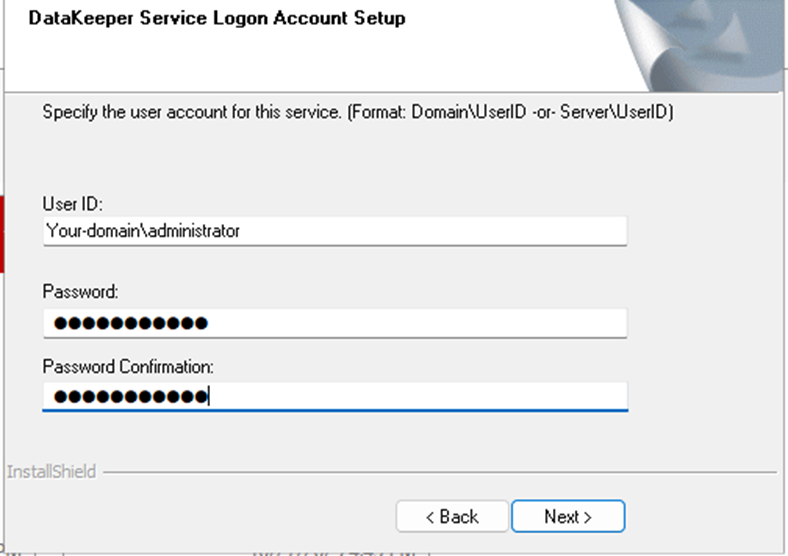
Enter the appropriate account information.
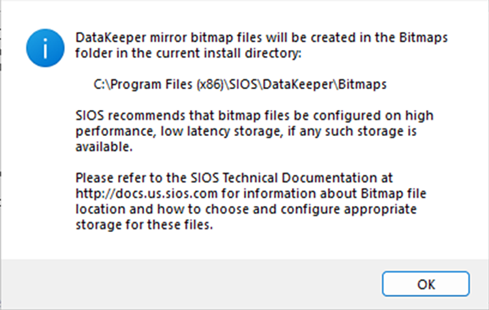
- Creating a Bitmap File Folder
A folder for the bitmap used internally by DataKeeper will be created.
![]()
This completes the installation procedure for LifeKeeper and DataKeeper using the Setup file.
3: Startup
To configure the HA cluster connections, LifeKeeper must be running on every server in the cluster. This section describes how to install a license after installing LifeKeeper, as well as how to start, stop, and check the running status of LifeKeeper.
LifeKeeper processes are managed through the Services MMC snap-in under Administrative Tasks.
Start, stop, and status checks are performed through the MMC snap-in.
Installing the License
After completing the installation wizards for LifeKeeper, Recovery Kits, and DataKeeper, the license installation screen will appear.
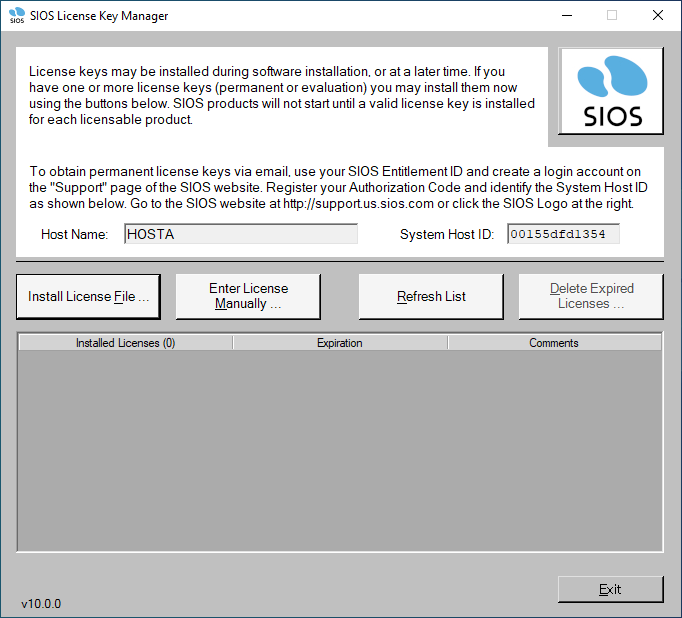
Click Install License File to apply your license from a file browser.
Follow the wizard instructions and restart
After installing the license, you must restart the computer to activate LifeKeeper.
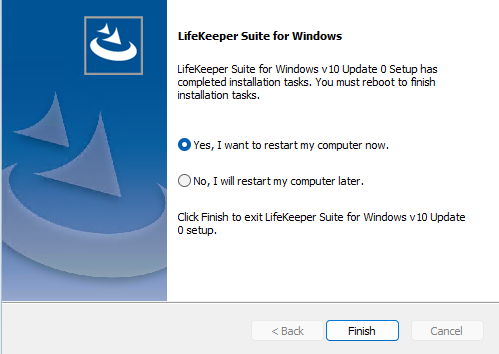
Be sure to restart your computer after installation.
After rebooting, the LifeKeeper services will start.
Installing the LifeKeeper for Windows Localized Language Supplement
LifeKeeper for Windows Localized Language Supplements are available to support LifeKeeper running in a localized environment. The Localized Language Supplement contains translated LifeKeeper GUI text strings and context-sensitive help in the localized language.
For details on the language pack, see Installing Localized Language Supplement.
The LifeKeeper for Windows Localization Language Supplement can be installed by running LKLangSup-<version>-Setup.exe in the folder extracted for both LifeKeeper and SSP to start the installation wizard.
After launching the installation wizard, follow the wizard to complete the installation.
No input is required.
Verifying LifeKeeper Startup
Use the MMC Services snap-in to verify that LifeKeeper is running. The following is an execution example.
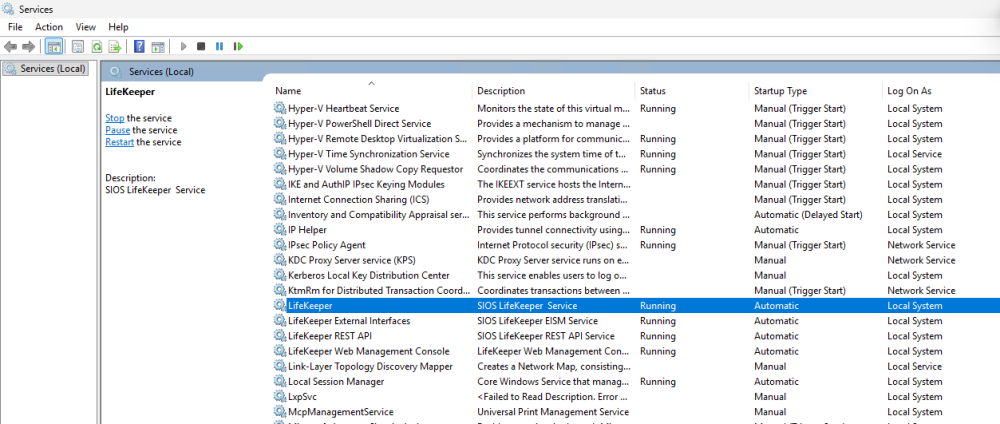
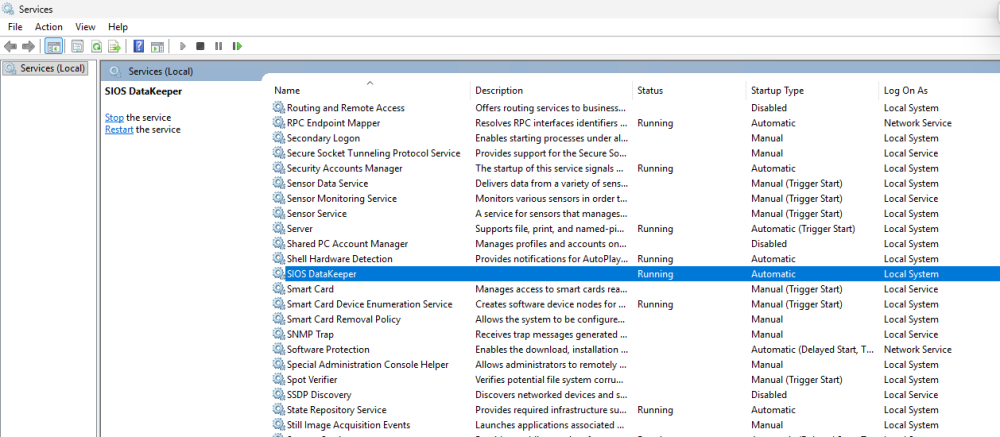
Ensure that LifeKeeper, LifeKeeper External Interfaces, LifeKeeper REST API, and the LifeKeeper Web Management Console (if installed), along with DataKeeper with “Status: Running” and “Status Type: Automatic” are displayed.
Begin configuring the LifeKeeper HA cluster by following the steps below.
Before proceeding to the next step, ensure that LifeKeeper has been installed and started successfully on all servers that will make up the HA cluster following the steps described above.
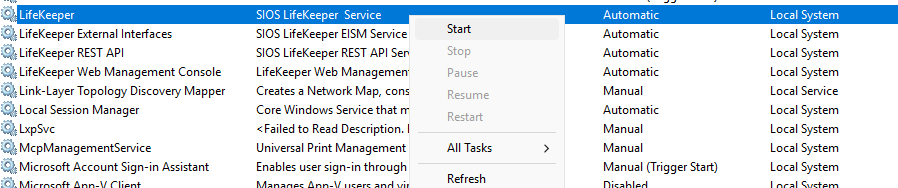
Starting LifeKeeper
To start LifeKeeper, press Start in the Services MMC snap-in.
Once LifeKeeper has been started using the Services MMC snap-in, its processes will automatically restart if the OS is rebooted while LifeKeeper is still running. If you do not want LifeKeeper to start automatically after the OS reboot, you must stop LifeKeeper before shutting down the OS by performing the following procedure.
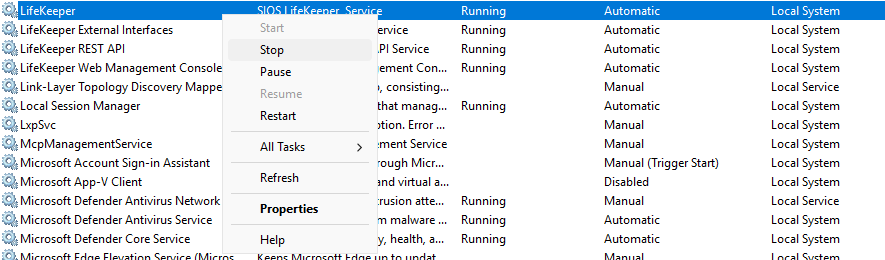
Stopping LifeKeeper
To stop LifeKeeper, click Stop in the Services MMC snap-in.
This completes the explanation of how to start and stop LifeKeeper.
4: Logging in to the GUI
To create a cluster system with LifeKeeper, you must first set up “communication paths” between the servers that make up the HA cluster. Then, create “resources” to define what is to be protected. The following explains how to configure communication paths and create various resources.
For information on browsers that can be used for connection, please refer to the System Requirements page in the LKWMC manual.
Enter the following in the address bar of the browser you are using for the connection
| *https://{IP address or host name of the server where LifeKeeper is installed}:5110/lkgui/#/** |
If the connection is successful, the login screen will be displayed in the browser as shown below.
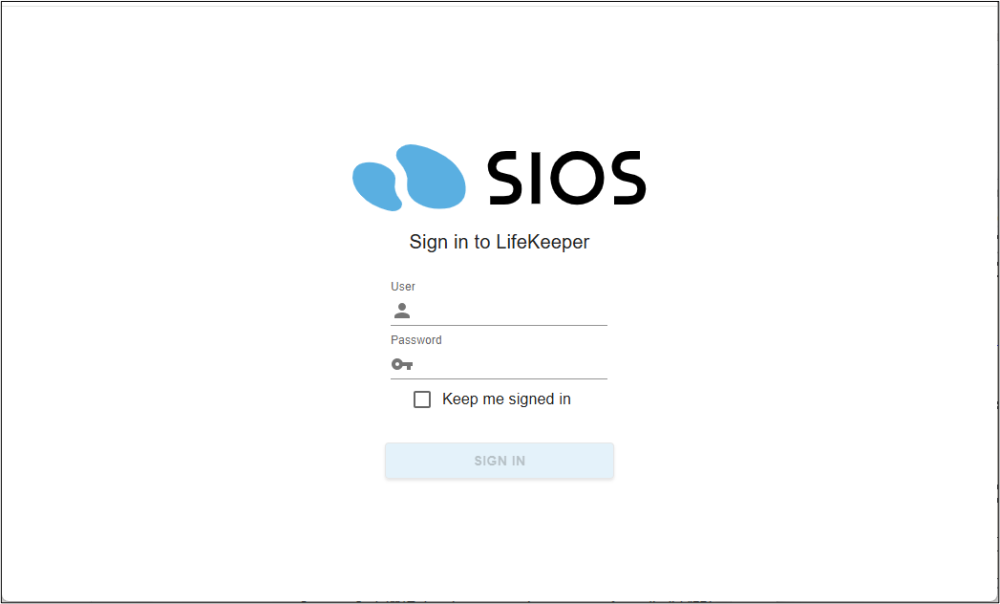
On the login screen, enter “root” in the User field, and enter the OS root user’s password in the Password field.
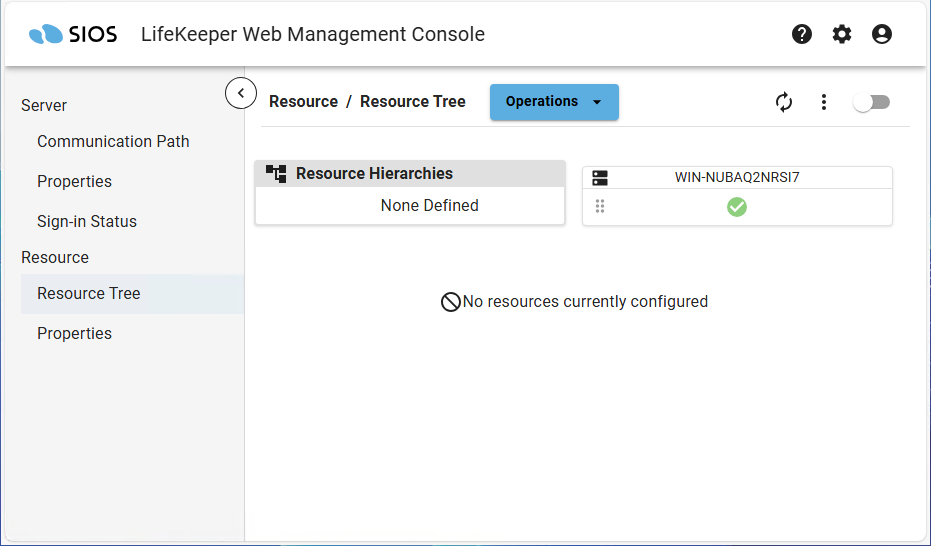
If you successfully log in, the following screen is displayed.
If any errors occur after connecting, please check the following:
- The LifeKeeper core is running
- Refer to the ”Verifying LifeKeeper Startup” section of this document.
- The LKWMC GUI server and REST API server are running
- Refer to the LKWMC Manual Quick Start Guide: Prerequisites to verify that no required settings are missing.
- There are no issues with the network connection between the client running the browser and the server
- Verify that there are no issues with basic network connectivity and that there are no problems with the firewall settings on the server or client. For information on firewalls related to LKWMC, refer to Firewall Rules in the LKWMC manual.
- There are no issues with the name resolution of the destination host name and the configured IP address
- Check if there are any problems with the settings of the hosts file or DNS.
If the issue persists after checking the above points, please contact your contracted support desk.
5: Creating a Communication Path
To create an HA cluster system with LifeKeeper, you must configure “communication paths” between the servers that make up the HA cluster. Then, create “resources” to define what is to be protected. The following explains how to configure communication paths and create various resources.
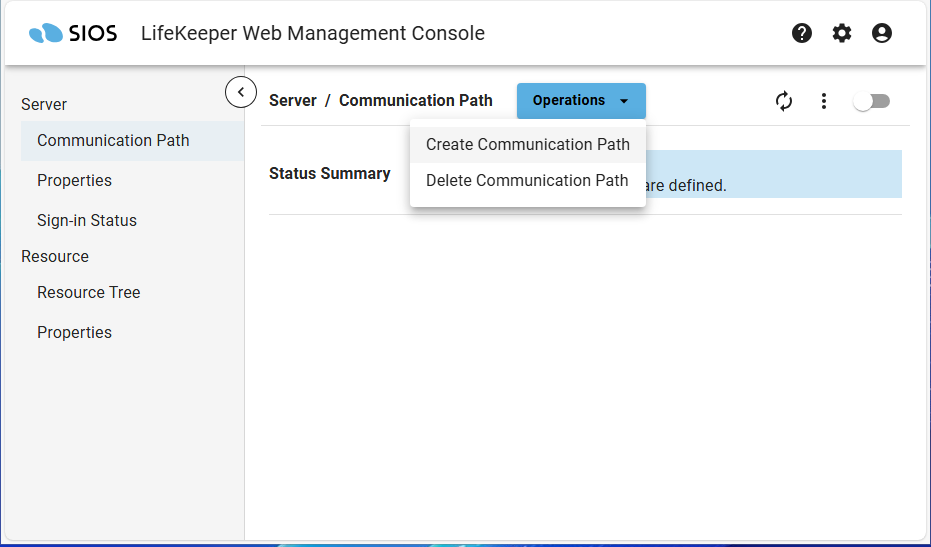
Click Communication Path in the left pane of the Management Console to open the Communication Path management screen.
Click the Operations button displayed in the central screen, then select Create Communication Path from the drop-down menu to display the creation dialog.
In the communication path creation dialog, enter the necessary information and click Confirm.
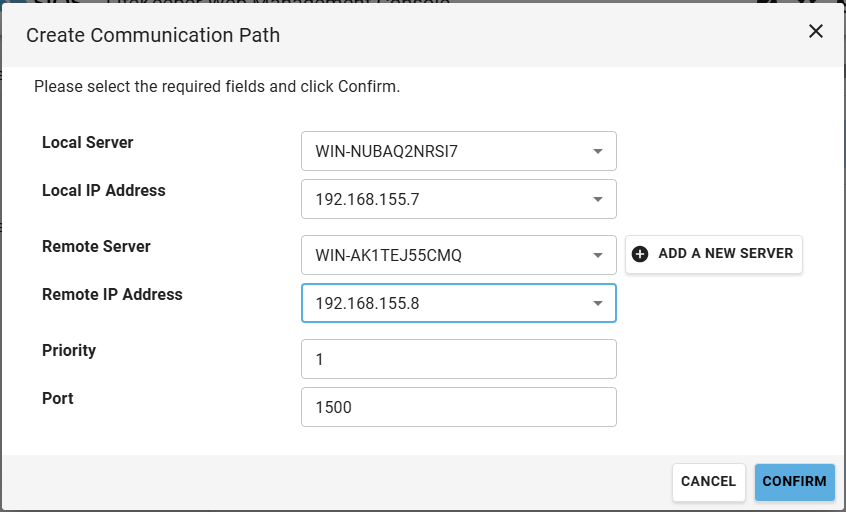
Details for each field are as follows.
- [Local Server]
Select the server that you want to create the communication path on. The list of local servers contains a list of servers to which LKWMC is currently connected. - [Local IP Address]
Select a valid IP address for [Local Server]. - [Remote Server]
Select the remote server for which to create the communication path. If the destination server is not displayed in the drop-down menu, press the ADD A NEW SERVER button to the right of the Remote Server field.- In the form that appears after pressing Add a New Server, enter the IP address or host name of the server to be added, then enter the username and password configured for the server you entered to authenticate.
- If authentication succeeds, you can set the new server as the remote server when creating a communication path.
- [Remote IP Address]
Select a valid IP address for [Remote Server]. - [Priority]
You can set the priority for communication paths between [Local Server] and [Remote Server]. Values from 1 to 99 can be set, with 1 being the highest priority and 99 the lowest. By default, the highest available priority value between [Local Server] and [Remote Server] is entered, so no change is necessary unless there is a particular reason.
After entering all the values and pressing the CONFIRM button at the bottom, a confirmation screen displaying the settings will appear.
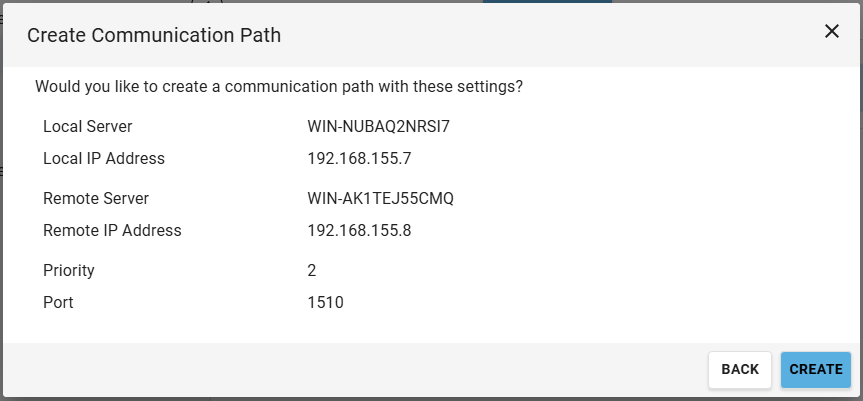
After checking the input values, click CREATE to start creating communication paths. Once completed, the communication path creation results will be displayed.
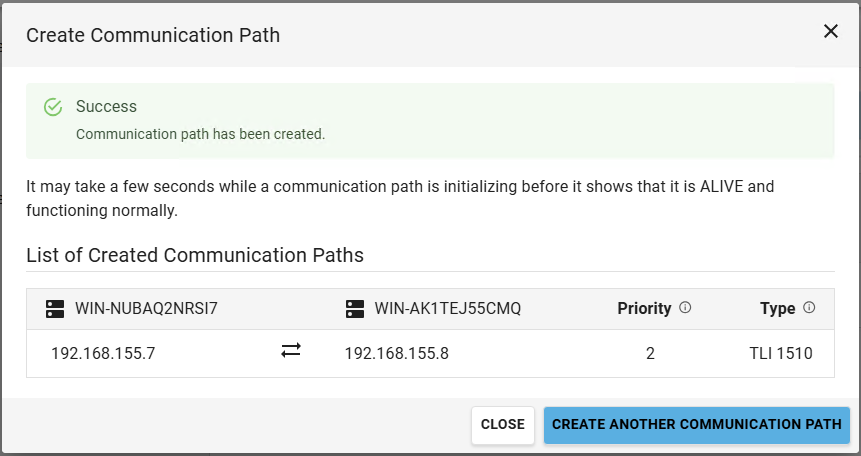
Click Create Another Communication Path on the creation results screen to create communication paths consecutively. To finish configuring communication paths, click CLOSE.
The communication path configuration is now complete.
After configuring, verify that the communication path status is “ALIVE” from the communication path management screen. Below is an example.
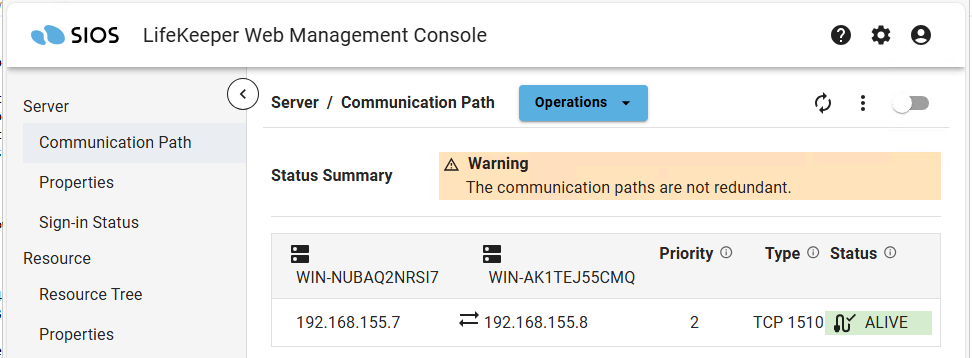
If a communication path connection issue occurs, the status will be shown as DEAD. If the status does not become ALIVE, verify the following in addition to all previously performed steps:
- Refresh the browser to check for status changes
- Status reflection on the screen may be delayed. Please refresh your browser to check the status.
- LifeKeeper core is running
- Refer to the “Verifying LifeKeeper Startup” section of this document.
- Communication is enabled via the communication path port (7365/TCP)
- Check the firewall settings of all hosts to which the communication path is connected.
If the issue persists after checking the above points, please contact your contracted support desk.
If at least one communication path is configured and the status is ALIVE, you can proceed to the next step.
6: Configuring the resource hierarchy
Create resources to be protected by LifeKeeper. The necessary prerequisites and configuration settings differ for each resource type. For specific details on resource creation, refer to the individual Administration Guides under Recovery Kits in the product documentation. This guide only covers the basic steps for launching and navigating the resource creation screen.
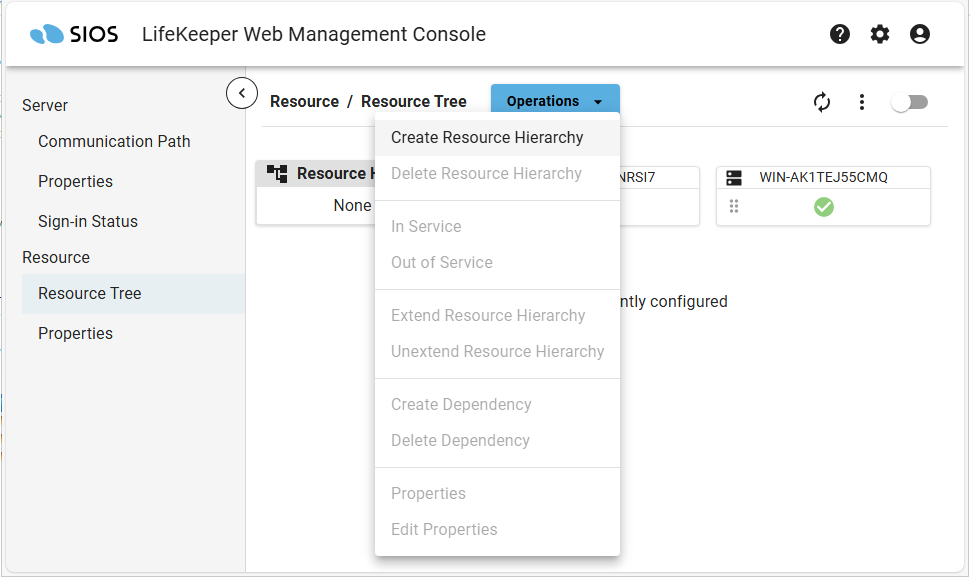
To create a resource, click Operations on the Resource Tree screen and select Create Resource Hierarchy from the drop-down list.
Follow the steps below to create a resource:
- Check the prerequisites for the resources to be protected and make the necessary preparations
The Administration Guide for each Recovery Kit contains information such as the prerequisites required to protect applications. Review this information and configure the necessary settings for the protected application. - Select the server and Recovery Kit
Select the server where you want to create the resource and the Recovery Kit for that resource. The list of available Recovery Kits will only display those that are enabled on the selected server. - Enter required items
Enter the required values for creating the resource. - Enter advanced settings
Enter the optional items required for creating the resource. Since default values are populated for all fields, you can skip this step by clicking Next. - Verify input values
After confirming that there are no problems with the entered values, click EXECUTE to execute the resource creation. - Execution
Resource creation is executed, and the execution log and results are displayed on the screen. Once the resource creation is complete, you can continue to extend the resource hierarchy.
If you need a more specific resource creation example, please refer to the Creating Resource Hierarchies.
After completing the resource configuration, you can switch resources or perform checks via the LKWMC. For other LKWMC operations, refer to the GUI section of the LKWMC documentation.
Testing Your Resource Hierarchy
After creating a resource, test a manual switchover to ensure that your application can be moved from the active cluster to the standby server. To do this, right-click on the top level resource on the standby system and choose In Service. This will initiate a manual switchover.
Once you verify that a manual switchover completes as expected, you may wish to test Local Recovery. Local Recovery is a feature that automatically restarts services when application failures are detected during quick checks performed at regular intervals.
Enabling or disabling local recovery must be configured in advance for each resource. For details, refer to the documentation for each Recovery Kit. Local recovery can be tested by stopping the service of the protected application on the active node.
The final test you will want to perform is a system recovery. If the active server fails completely, the standby server will detect the failure as it stops receiving heartbeats over the communication path. Once the timeout period expires (heartbeat interval X max missed heartbeats), the standby server will start recovering the protected resources.
For information on heartbeat interval and maximum number of missed heartbeats, refer to the [TCP/IP Comm Path] section in Creating a Communication Path.
With LifeKeeper for Windows, you can specify the behavior when a shutdown is performed on the OS. For details, see Set Server Shutdown Strategy. When testing system recovery, pull the power cord on the active server or use a tool such as NotMyFault published by Microsoft to hang the system.
Once the standby server completes the recovery, turn the failed server back on, and it will come online as the new standby server.
Post your comment on this topic.