
LKWMC is the default GUI starting with LifeKeeper v10. If you need to use the legacy GUI, please refer to this section.
Verifying the GUI server startup
To use the LifeKeeper GUI client, the LifeKeeper GUI server must be running on the LifeKeeper installed server. Typically, the GUI server starts and stops automatically with LifeKeeper’s startup and shutdown. However, you can also start and stop the GUI server independently. Even when the GUI server is stopped, it does not affect the HA cluster functions such as fault detection and failover. After setting up the cluster environment, if GUI access is not required, you may choose to keep the GUI server stopped during normal operation and start it only when necessary.
The procedure for starting and stopping the LifeKeeper GUI server is as follows.
- Starting the GUI server
To start the GUI server, execute thelkGUIserver startcommand.
![]()

- Stopping the GUI server
To stop the GUI server, execute thelkGUIserver stopcommand.
![]()

Note: You can also restart it by using restart as an option. If you have a problem with the GUI display, restarting the GUI server may fix it.
Creating an HA cluster system
To create an HA cluster system with LifeKeeper, you must configure “communication paths” between the nodes that make up the HA cluster. Then, create “resources” to define what is to be protected. This document explains how to configure communication paths and create file system resources.
- Connecting with the LifeKeeper GUI client
The GUI client is launched using the lkGUIapp command. After starting LifeKeeper, launch the LifeKeeper GUI client using the following command. Below is an execution example.
![]()
For information on how to connect to the legacy GUI from a remote system outside a firewall, refer to the section Running the LifeKeeper GUI Through a Firewall in the product documentation.
After executing the command, the GUI client will launch and the login screen will appear.
![]()
The Server Name field displays the name of the server that executed the command.
For the login user name and password, enter the OS user information belonging to the LifeKeeper management user group (lkadmin).
After logging in, if LifeKeeper is running and there are no issues connecting to the LifeKeeper GUI server, the following screen will appear.
![]()
- Creating a Communication Path
Launch the wizard to create a communication path in the GUI client, then create the communication path. To launch the wizard, select Edit from the GUI client toolbar, then select Server and *Create Comm Path*….
The setup wizard will configure the settings in the order shown in the table below.


Communication Path Settings
| 1 | Local Server | Select the server running the GUI client |
| 2 | Remote Server | Enter or select the server name that is not running the GUI client |
| 3 | Device Type | Select TCP |
| 4 | Local IP Address | Select an IP address |
| 5 | Remote IP Address | Select an IP address |
| 6 | Priority | Set the priority |
Proceed through the wizard and input the required fields; the Create button will then be displayed. Selecting the Create button initiates the communication path creation.
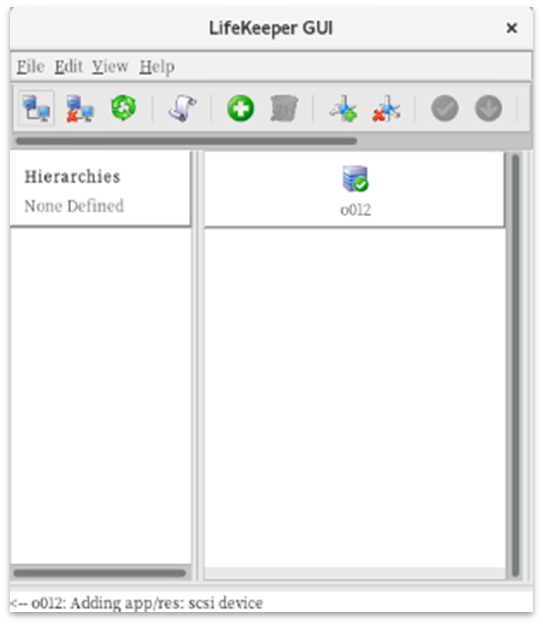
Upon completion, the GUI screen will update as shown below.
This completes the setup for the first communication path.
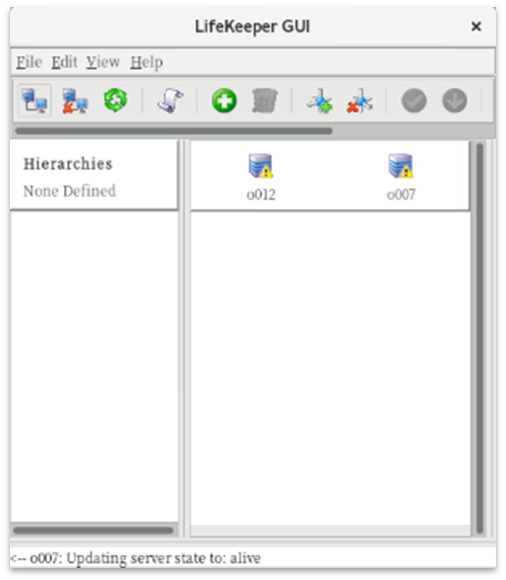
Configure the second and subsequent communication paths using the same procedure as the first.
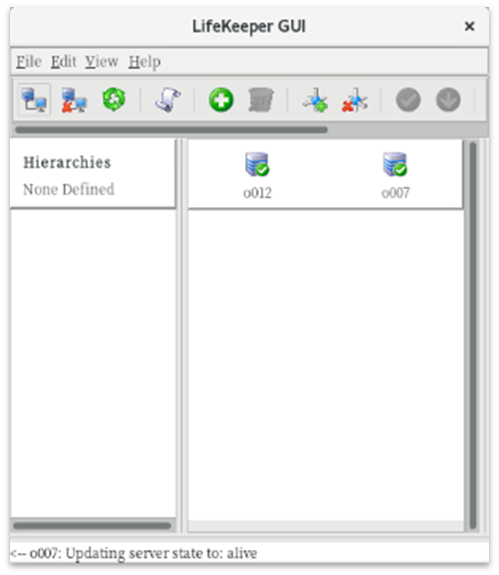
After creating two or more communication paths, the server icons will be displayed in green, as shown below.
- Creating a protected resource (file system resource)
Create resources corresponding to the services and applications you want to protect. This document illustrates the procedure for creating file system resources. For information on creating other resources, refer to the respective Administration Guides under Application Recovery Kits in the product documentation.
The file system resource provides the ability to switch the file system on the shared storage device between HA cluster nodes. T*o create a file system resource, the following requirements must be met*.
- The shared storage device is physically connected and accessible from all servers in the same manner
- The shared disk has been partitioned with a GUID Partition Table (GPT) using a utility like parted
- The file system is created using a utility such as mkfs
- The file system can be mounted/unmounted on each server
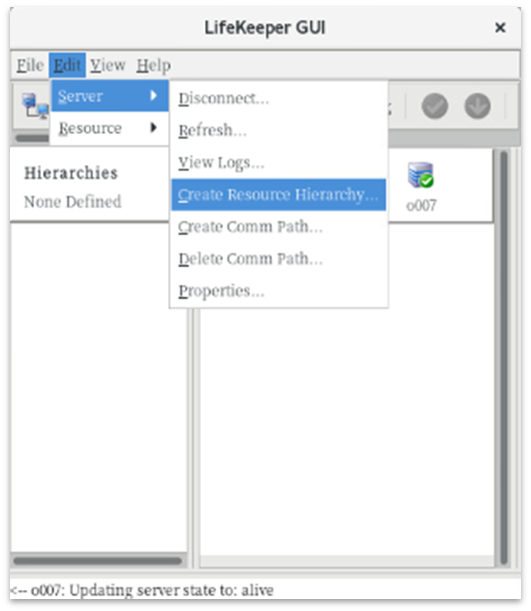
Once you have confirmed that the conditions for creating a file system resource are met, launch the wizard for creating the file system resource in the GUI client. To launch the wizard, select Edit from the GUI client toolbar, then select Server > Create Resource Hierarchy.
![]()
The settings configured in the File System Resource Creation Wizard are as shown in the table below.
File System Resource Settings
| 1 | Please Select Recovery Kit | Select the file system |
| 2 | Switchback Type (primary node) | Select intelligent or automatic |
| 3 | Server | Select the primary node name |
| 4 | Mount Point (primary node) | Select the mount point |
| 5 | Root Tag (primary node) | Select or enter the tag name |
| 6 | Target Server | Select the backup node name |
| 7 | Switchback Type (backup node) | Select intelligent or automatic |
| 8 | Template Priority (primary node) | Select the default value |
| 9 | Target Priority (backup node) | Select the default value |
| 10 | Mount Point (backup node) | Select the default value |
| 11 | Root Tag (backup node) | Select the default value |
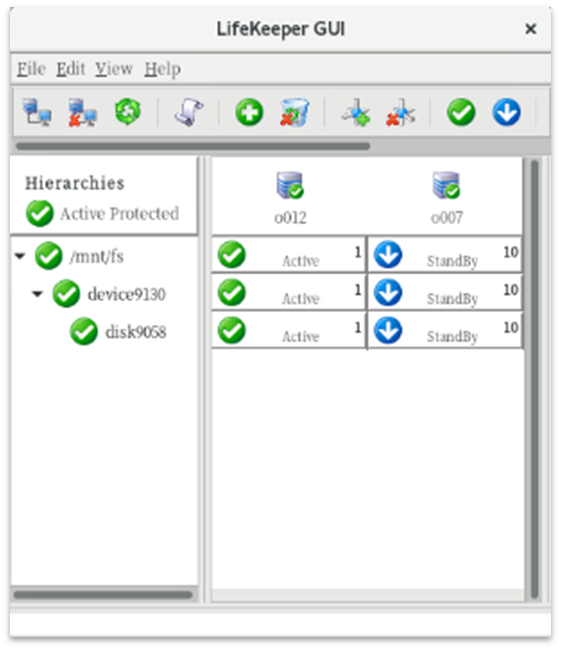
Once resource creation and extension are complete, the screen will appear as follows. LifeKeeper will begin monitoring the protected resources.
This concludes the basic operations using the legacy GUI. For other details regarding the use of the legacy GUI, refer to the GUI section in the product documentation.
Post your comment on this topic.