
This guide assumes you have some familiarity with Oracle Cloud Infrastructure (OCI) and a basic understanding of networking concepts. It illustrates common configuration tasks with descriptions and, where necessary, provides additional guidance to navigate some of the common challenges encountered in OCI networking.
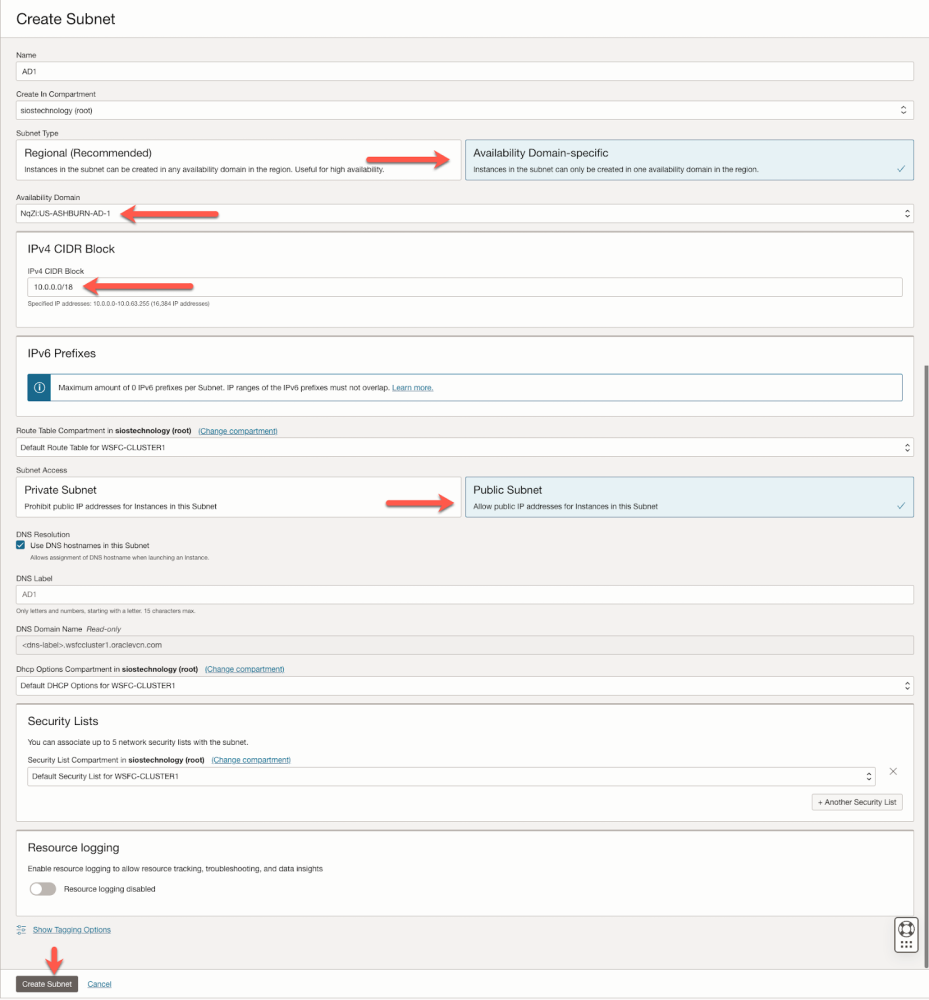
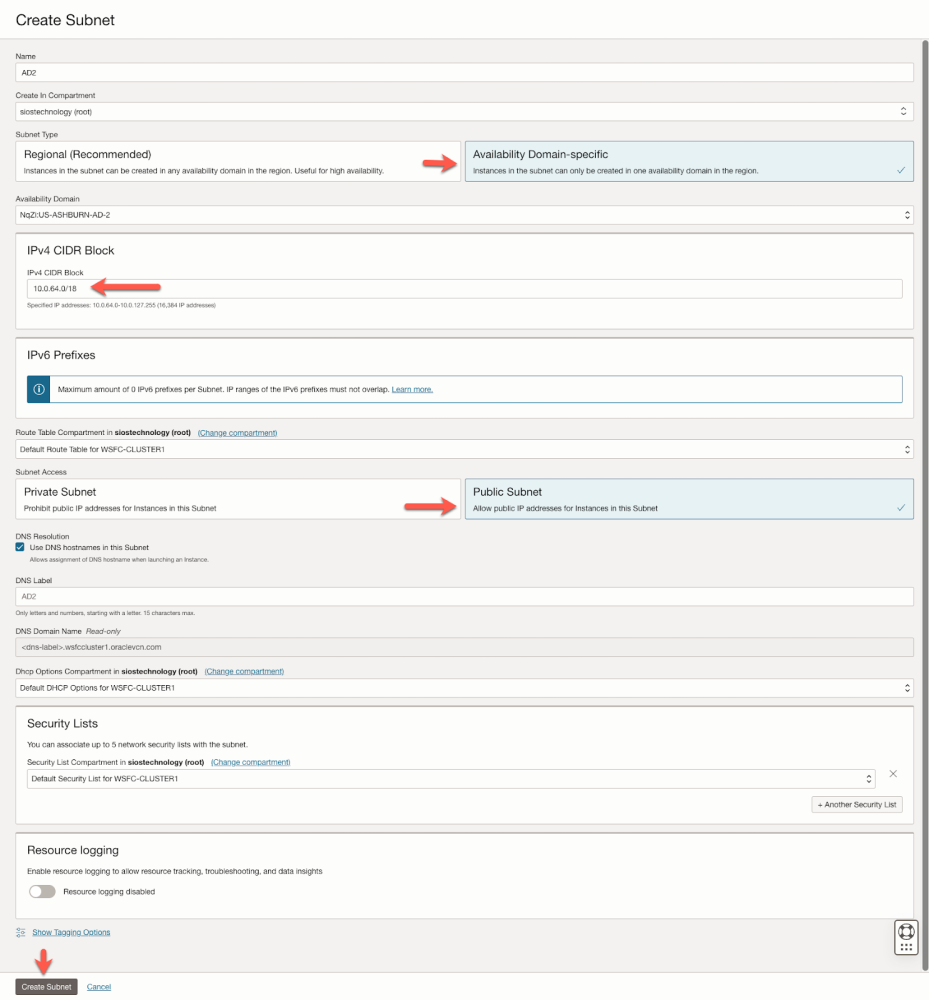
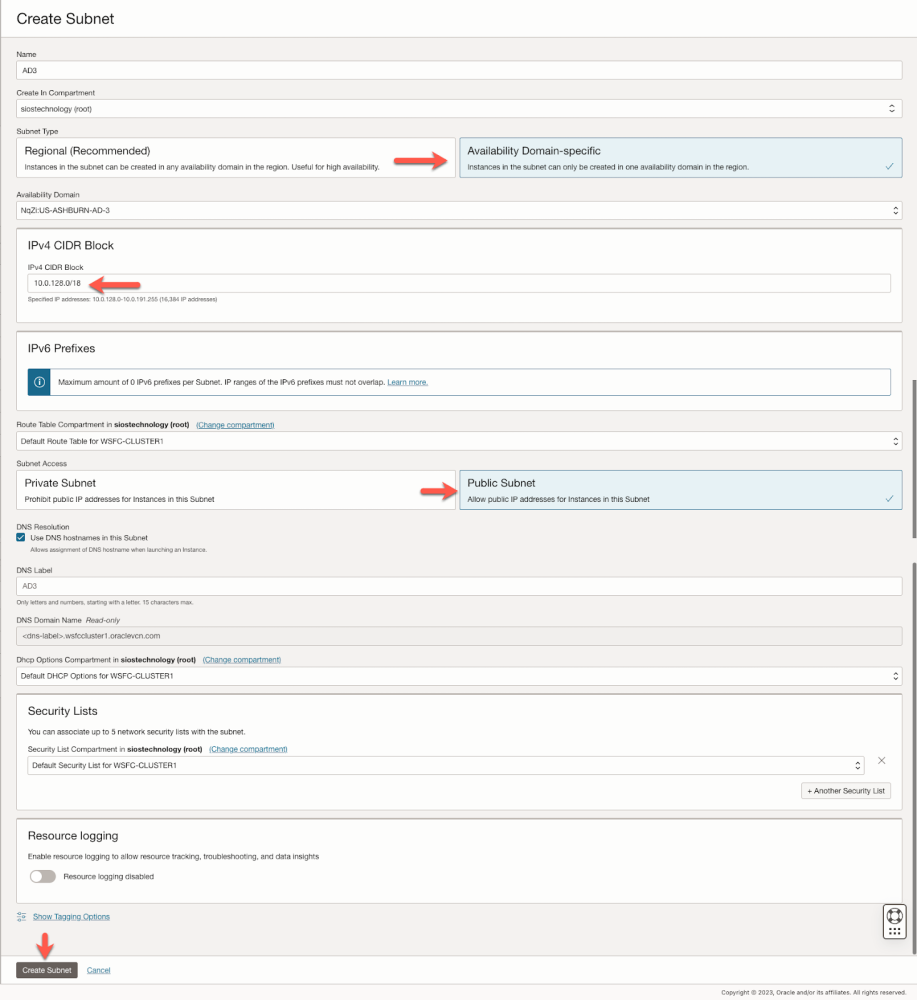
Starting with a well-thought-out network plan is crucial. This document won’t cover the intricacies of cloud network planning, so the following example should be considered just one of many possibilities. Your network configurations may vary significantly. However, an important consideration is to plan for the use of at least three Availability Domains, allocating one for each cluster node and another for the file share witness. The important thing required for clustering is that each Availability Domain MUST be in a different subnet.
Although we are not covering configurations that span Fault Domains instead of Availability Domains, the same applies to clusters that span Fault Domains – all nodes must reside in different subnets.
In our scenario, we will set up three subnets across three different Availability Domains within a single Virtual Cloud Network (VCN) in OCI.
NOTE: You are not required to create multiple subnets, as OCI does support spanning a single subnet across multiple Availability Domains if you wish to have a single subnet.
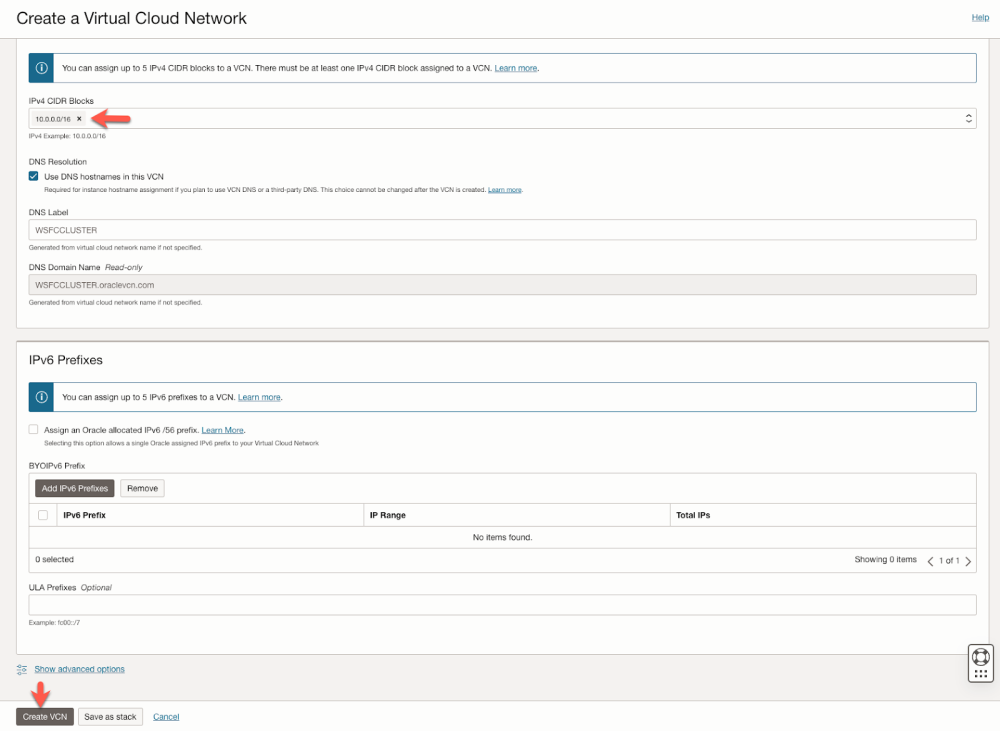
VCN: 10.0.0.0/16
- AD1: 10.0.0.0/18
- AD2: 10.0.64.0/18
- AD3: 10.0.128.0/18
OCI’s user interface can change, but at the time of writing, creating a new VCN and three subnets is straightforward in the OCI console. The specifics can be found in OCI’s documentation or user interface, which guides you through the necessary steps for VCN and subnet creation.
Create the VCN
Create a new VCN. In this case, we created a VCN with the IPv4 CIDR of 10.0.0.0/16. We also called it WSFCCLUSTER.
Create Three Subnets in the VCN
Now we must create three public subnets within the VNC. Each subnet will have its own IPv4 CIDR Block and will be assigned to a specific Availability Domain.
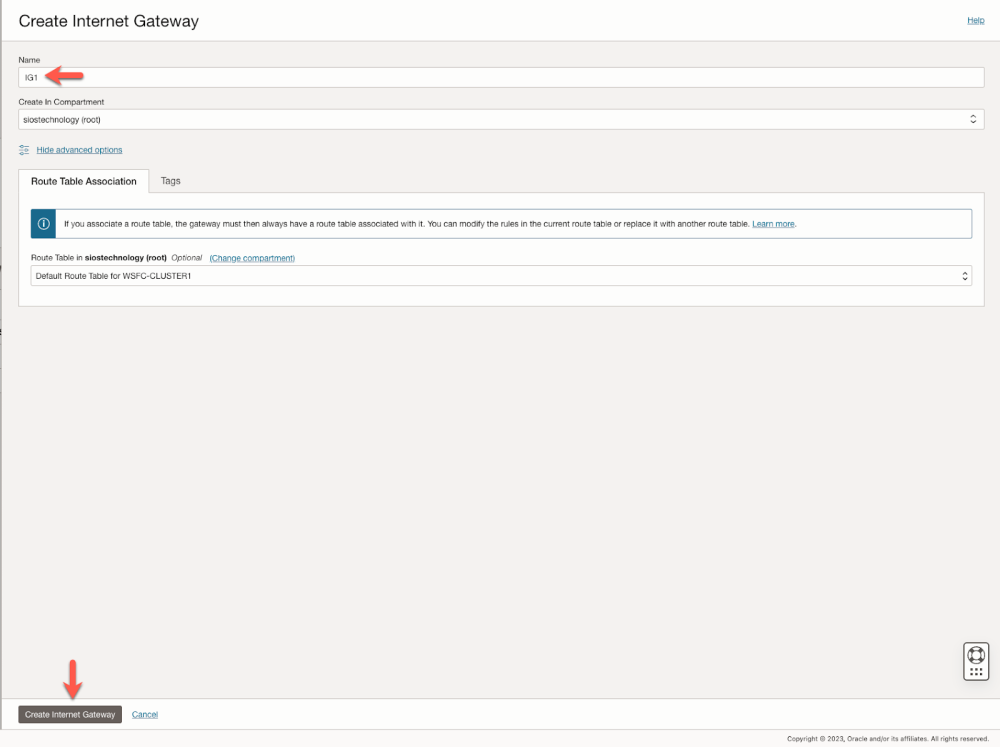
Create the Internet Gateway
The Internet Gateway is how our instances will gain access to the internet. The pictures below illustrate how we created a new Internet Gateway called IG1.
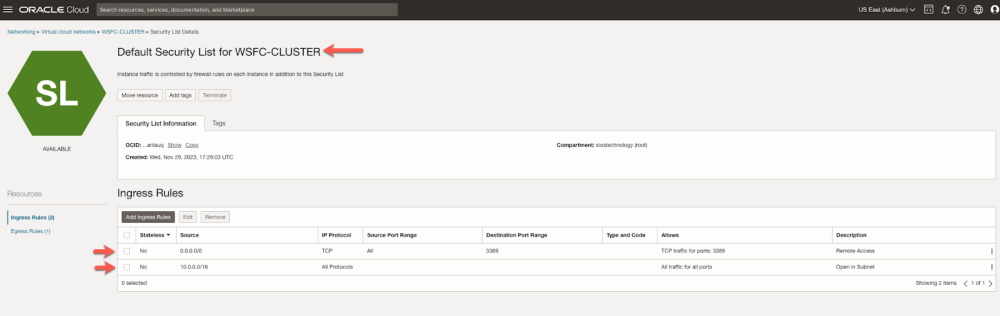
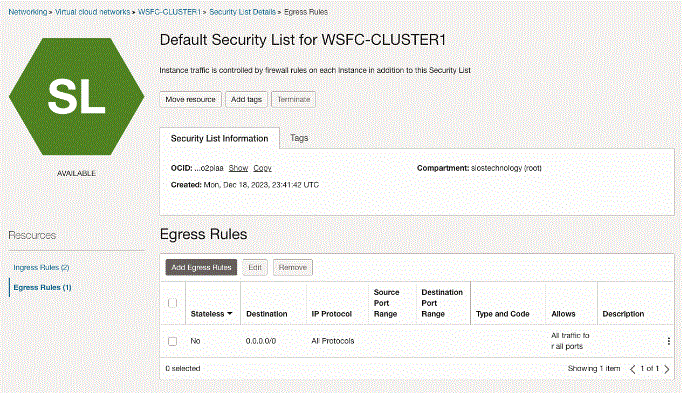
Edit the Default Security List
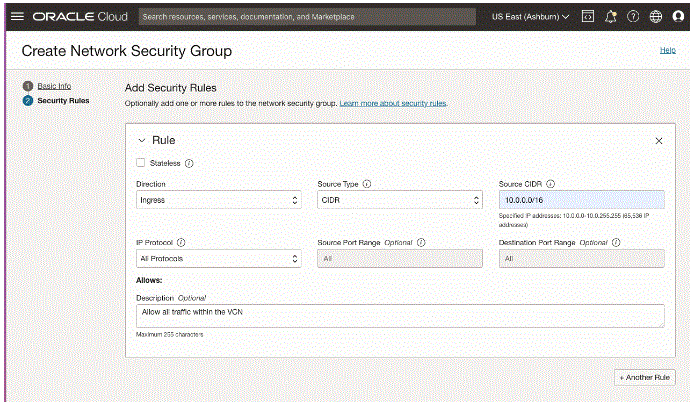
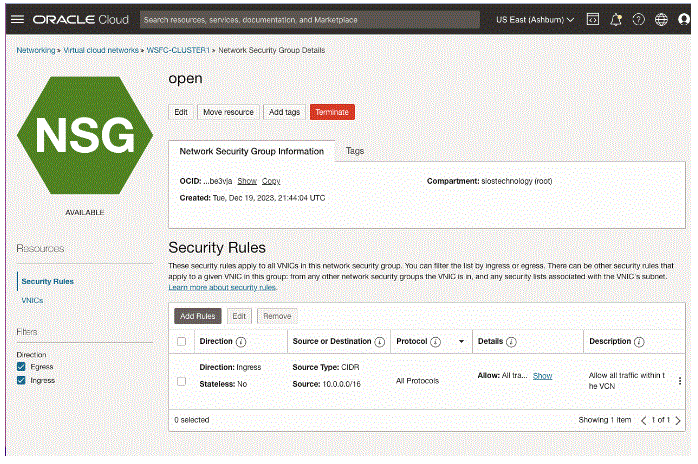
Edit the Default Security List to allow all traffic to flow freely across the entire VCN. A rule to allow remote access was also added.
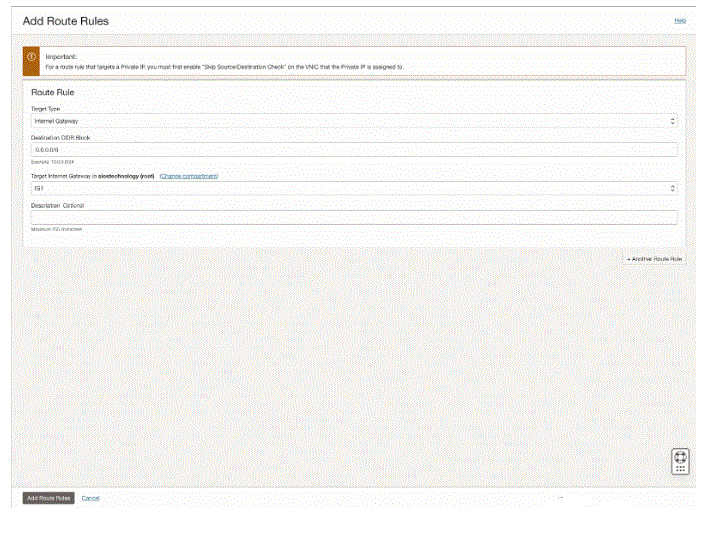
Edit the Route Table
Edit the route table so that all traffic destined for outside the VCN is routed through the internet gateway.
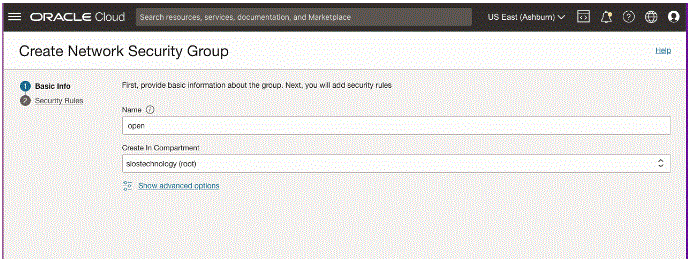
Create a Network Security Group
Edit the Security List
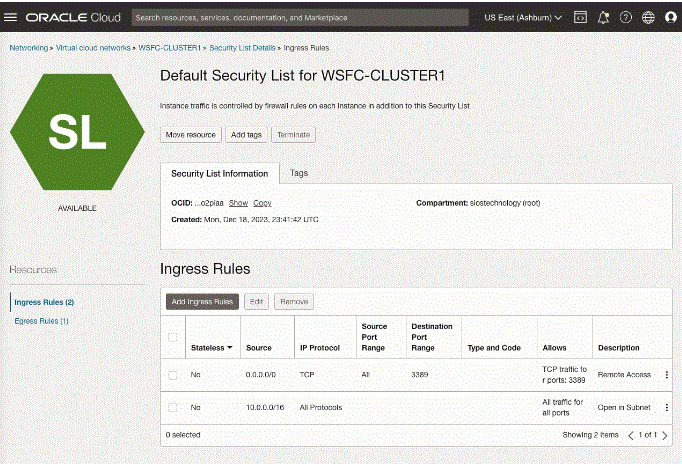
These settings allow unfettered access across availability domains, and allows RDP access from anywhere. You may consider limiting which IP addresses can RDP to your instances or even setting up a “jump VM” used exclusively for RDP access from the public network.
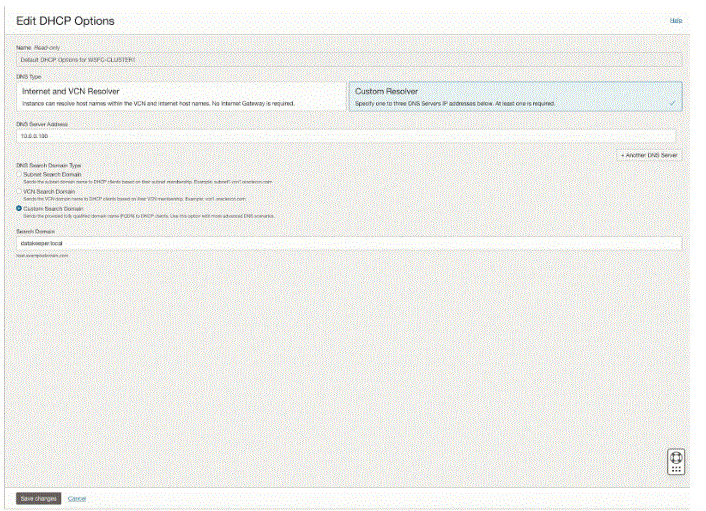
Edit DHCP Options
For Active Directory to work correctly, you must set the DC1 as the primary DNS server in the DHCP options as shown below. In this case, we set it to 10.0.0.100, which is the static IP of the domain controller we are configuring. You should also add your domain to the custom search domain. In this case, we will use the domain called datakeeper.local, which we will build later when we configure our domain controller.
Post your comment on this topic.